
A creamy, rich layer of cheesecake sandwiched between two layers of fluffy, moist red velvet cake. It is then covered in a smooth classic cream cheese frosting and finished with red velvet cake crumbs to give it a plush, gorgeous finish. The ultimate romantic dessert.

This decadent dessert is a real show stopper! And because the
cheesecake layer needs to be refrigerated overnight you can prepare the
layers in advance the night before and assemble before serving.


I
made the cakes and cheesecake in 6" pans to create a sky high layer
cake, but you can also use larger pans for a shorter cake with a larger
diameter for more servings. To create a heart shape, I baked the cheesecake layer in a disposable makeshift springform pan I created in the shape of a heart.

Create Disposable Heart Shaped Cheesecake Pan:
To create a pan for your cheesecake without having to buy a springform pan, simply use my original DIY disposable pan method.*
Simply fold a long piece of foil into one long strip about 2-4 inches high. Fold it in half to create the bottom point of the heart. Overlap the top ends of the foil strip and fold them together creating the top fold in the heart. Staple to hold the ends together and shape heart with your hands until you have a nice rounded heart. Take another piece of foil and place it under your heart. Fold the foil up the sides of the heart so the cheesecake cannot leak out of the bottom. You now have a heart shaped pan for your cheesecake that you can easily pull/rip away from your baked cake!


Place
your cheesecake pan directly above the water pan, and bake at 325
degrees F. Let rest in the oven, with the door ajar
slightly and the heat turned off for about an hour. To create this layered dessert, you first bake the cheesecake layer and freeze it overnight so it is easy to handle when stacking your cake.

Bake round red velvet cake layers and use your frozen cheesecake as a template to cut your cakes into heart shapes and slice off any domed tops. Do not discard the cake scraps! You may also make the cake layers in advance the night before and freeze them to keep them fresh and also make them easier to cut.

You will then take the cake scraps and crumble them up to use for the outer crumb layer once frosted.

Stack your cake by sandwiching the cheesecake between the two cake layers. You do not need to frost between the layers as the cheesecake will act as a ceamy, rich layer of filling.

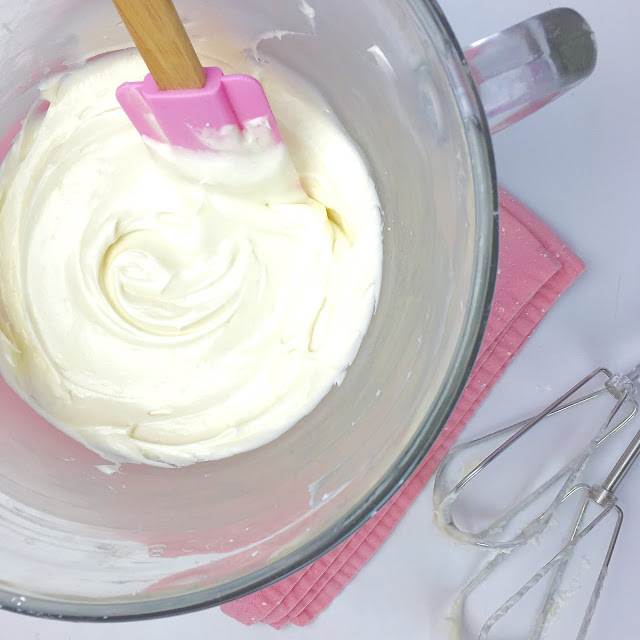
Frost your cake with cream cheese frosting.
Don't worry about not getting crumbs in your frosting because we will be covering it in cake crumbs anyway!

Don't worry about not getting crumbs in your frosting because we will be covering it in cake crumbs anyway!

Rub scraps of cake together with your hands to create red velvet cake crumbs.

Press cake crumbs onto freshly frosted cake.

Let cake thaw at room temperature before serving so cheesecake is no longer frozen.

Slice and enjoy!

Heart Shaped Red Velvet Cheesecake Layer Cake
Ingredients
Cheesecake Layer:
- 1 (8 ounce) package cream cheese, room temperature (do not use light or low fat)
- 1/4 cup plus 2 tablespoons granulated white sugar
- 1 egg, room temperature
- 1/4 cup sour cream
- 3 tablespoons heavy whipping cream
- 1 teaspoon vanilla extract
- 1 tablespoon cornstarch
- 2 1/2 (280g) cup cake flour
- 2 tablespoons (20g) unsweetened natural cocoa powder
- 1 teaspoon baking powder
- 1 teaspoon baking soda
- 1/2 teaspoon salt
- 1 1/2 cup (288g) granulated white sugar
- 1 1/2 cup vegetable oil
- 2 large eggs, room temperature
- 1 cup sour cream, room temperature
- 2 tablespoons (1oz) red food coloring
- 2 teaspoons vanilla extract
- 1 teaspoon white vinegar
- 1/4 cup (1/2 stick) unsalted butter, room temperature
- 4oz cream cheese (1/2 an 8oz block), room temperature
- 1/2 teaspoon vanilla extract
- 1/8 teaspoon salt
- 2 cups (1/2lb) powdered sugar, sifted
Directions
Prepare Cheesecake Layer:
Preheat oven to 325 degrees F. Grease or use non stick spray on sides and bottom of a 6 or 7 inch heart shaped (or classic round) homemade disposable cheesecake pan (or store bought springform pan) and place on a baking sheet.
Using an electric mixer, beat the cream cheese on medium speed until creamy. Reduce the speed to low, gradually add the sugar and beat until smooth. Do not over beat, this incorporates too much air into the batter, which can cause the cheesecake to rise and then sink during baking. Scrape down sides and bottom of bowl. On low speed, gently beat in the egg, until incorporated. Add the sour cream, heavy cream, vanilla and cornstarch just until incorporated. Pour cheesecake filling into prepared pan.
Place a baking pan filled with 1-2 inches of water in the center of the oven rack directly below your cheesecake. This will keep it moist and prevent it from sinking. Bake cheesecake in the center of the middle oven rack, directly above your pan of water, for about 35-40 minutes. Do not over bake. Cheesecake will be done when the center is still a little jiggly and the edges are lightly golden. Once cheesecake is done baking, you must let it rest. Turn oven heat off. Open oven door slightly and let cheesecake cool and set inside the oven for about an hour. The center will continue to cook and set as it cools down. Remove cheesecake from oven and cool completely on a wire rack on the counter top. Once cheesecake is completely cooled, place it in the freezer for a few hours or overnight.
Prepare Cake Layer:
Preheat the oven to 350 degrees F. Grease or use non stick spray on two 6-8 inch round cake pans.
In a small bowl, whisk together flour, cocoa powder, baking powder, baking soda and salt; set aside. With an electric mixer, beat together the sugar, oil and eggs, one at a time, on medium-high speed about 2 minutes until pale and fluffy. Beat in sour cream, food coloring, vanilla and vinegar. Slowly add flour mixture, on low speed, until just incorporated.
Prepare Frosting:
With an electric mixer, beat butter on medium speed until smooth. Beat in cream cheese (make sure they are both at room temperature so you do not get lumps in your frosting). Add vanilla and salt. Gradually beat in powdered sugar until incorporated. Beat on medium speed for about 3 minutes, until smooth and creamy.
Place cake layers on a plate and slice off any domed tops to create flat cakes for layering, if necessary. Remove cheesecake from the freezer and rip away foil pan. Use frozen cheesecake as a template by placing it on top of the cake layers and cutting your cakes into heart shapes with a knife. Do not discard cake scraps.
Assemble cake by placing one cake layer on a serving platter or plate followed by the cheesecake layer. Place the second cake layer upside down on top of the cheesecake creating a perfectly flat top. Take your knife and run it along the edge of your stacked cake to create a smooth heart shape.
Frost entire cake with cream cheese frosting. In a small bowl, rub cake scraps together to create red velvet crumbs for the topping. Press red velvet cake crumbs on the top and sides of the freshly frosted cake, covering the entire cake. Let cheesecake layer thaw by letting cake sit at room temperature or refrigerate until ready to serve.

Simply decadent...

My DIY disposable pans are great for anything from brownies, cookies, cheesecake, to cakes! I've made small round pans, perfect for my small batch dessert recipes, like my Mini 5" Pumpkin Cheesecake With Maple Spiced Whipped Cream made in a parchment paper pan.


...or stick with the custom heart shape, like my Fudgy heart brownie made in my foil pan.


Want more red velvet recipes?!:


