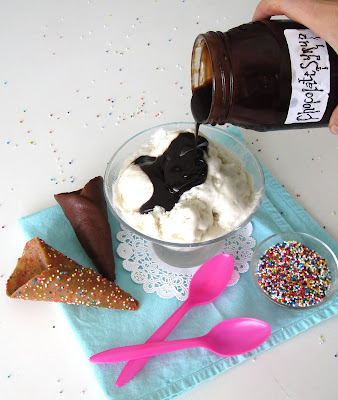
After making my classic sugar cones and bowls last year, I wanted to put a fun twist on them and create some flavored versions, like Confetti Cones, Chocolate Cones & Red Velvet Cones! They are are so much fun and are sure to be a big hit!
You can use this recipe to make either cones or bowls. Just create the batter, bake and form to enjoy fresh homemade ice cream cones or bowls at home any time! Get creative and dip your cones in melted chocolate and roll in chopped nuts or sprinkles for a sweet and festive touch! These are a little tricky, so start by making only 1-2 at a time and work your way up from there as you get faster.

For a classic version check out my original homemade sugar cone/bowl recipe!
The batter is so simple to make. Simple stir all the ingredients until smooth add your flavor variation and you are all set to start baking your cones and bowls!
Trace 2-3 five-inch circles on a sheet of parchment fit to the size of your baking sheet. Flip parchment paper over and place on baking sheet as a template for uniform sized cones/bowls. I like to stick with baking 2-3 at a time so the others don't set and crack by the time I get to forming them, as these cones will dry very quickly.
Spread about 1 heaping tablespoon of batter onto your parchment template. Make sure the batter is spread out thin and even so your cones and bowls come out nice and crisp.
CONES
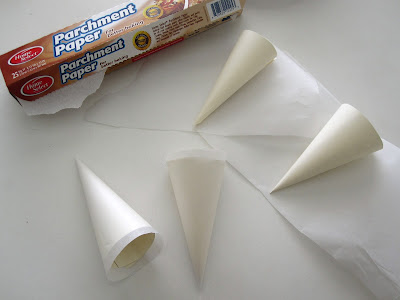
If you want to make cones you can create cone formers out of card stock paper. I made mini 5 1/2" tall triangle cone formers to create adorable bite sized cones and mini bowls, but you can definitely make larger templates for classic sized cones and bowls.
Start by cutting out a half circle, 5.5" tall in the center.
I stacked two sheets of paper on top of each other to make a few at once.
Next, cut the semi circle(s) in half, creating 5 1/2" tall triangles.
Then wrap each quarter circle around itself, forming a cone shape, and taping to secure to create your cone former.
Wrap the outside of the cone former in parchment paper and spray with non-stick spray for a non-stick surface so the cone can easily release from the former.
Ta da!
Spread your batter on to your template and bake.
Roll cone circle tightly around the bottom of your cone former (make sure you have room to pinch the tip of the cone shut). Use a paper towel to handle your cone if it is too hot to touch. Make sure to press down the seam and pinch the tip of cone shut, so ice cream will not drip through.
To make bowls, simply spread your batter on the template and bake as directed.
Immediately press your cone circle around an upside down cupcake/muffin tin or an upside down drinking glass and hold until it has cooled and hardened into a bowl shape. Use a paper towel to handle your cone if it is too hot to touch.
Voila, mini sugar cones and ice cream bowls!
Homemade Sugar Cones
Yields: 1/2 dozen mini 5" cones/bowls (or 1/2 cup batter)
Ingredients
- 1 large egg white
- 3 tablespoons granulated white sugar
- 1 tablespoon packed light brown sugar
- 1 tablespoon butter, melted
- 1/2 teaspoon vanilla extract
- 1/4 cup all-purpose flour
Variations
- Colored Cones: Stir 1/2 teaspoon food coloring into your batter
- Confetti Cones: Sprinkle 1/2-1 teaspoon rainbow (or color of your choice) sprinkles on top of your 5" batter circles before putting them in the oven.
- Chocolate Cones: Stir 1 tablespoon unsweetened cocoa powder (dark or dutch processed works best) into your batter.
- Red Velvet Cones: Stir 1/2 teaspoon cocoa powder and 1/2 teaspoon red food coloring into your batter.
Directions
Preheat oven to 325 degrees F. Trace 2-4 five-inch circles on a sheet of parchment fit to the size of your baking sheet. Flip parchment paper over and place on baking sheet as a template for uniform sized cones/bowls. Create cones molds if desired out of card stock paper by cutting out 5 1/2 inch triangles, wrapping it around itself forming a cone shape, and taping to secure. Wrap the outside of the cone mold in foil or parchment paper so the cone can easily release from the mold. Make one cone mold for each circle on your parchment paper template.
Whisk together the egg white and sugars until frothy. Add butter, vanilla and any variation ingredients listed above, if using. Gently stir in flour until smooth.
Spoon about 1 heaping tablespoon of batter onto the parchment lined baking sheet using a small offset spatula or knife, using your circle templates as a guide. Make sure they are spread out thin and even so they come out nice and crisp. Bake for about 9-11 minutes. Immediately remove from pan with a spatula and very quickly, shape your cones into mini cones or bowls:
- Cones: Roll cone tightly around your cone former (make sure you have room to pinch the tip of the cone shut). Use a paper towel to handle your cone if it is too hot to touch. Make sure to press down the seam and pinch the tip of cone shut, so ice cream will not drip through. Place cone, open side down, on a cooling rack and let cool on cone mold until they have hardened and hold their shape, about 8-10 minutes. Repeat with remaining cones. Once cooled, gently remove cones from cone molds and repeat with remaining batter.

- Bowls: Flip over a cupcake/muffin pan and lightly grease the outsides of the cups (you can also use individual small custard bowls or drinking glasses flipped upside down). Place the center of the cone on top of the upside down cupcake well/bowl/glass and press the sides down to create an upside down bowl shape. Place a paper towel on top of the cone and use a rubber band to hold down sides of cone to hold it in it's bowl shape. Repeat with remaining cones and let cool on cupcake pan/bowl/glass until they have hardened and hold their shape, about 8-10 minutes. Once cooled, gently remove cones and repeat with remaining batter.


